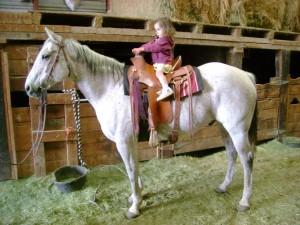
 This might be one of the more obvious posts on this blog, leaving some of my readers wondering about my credibility as a cowgirl, if I have to explain something so elementary. But one of my goals with my writing is to provide a resource for beginner horse lovers, and we all start at the same square one, so in this post I’m filling in one of those first blanks: how to saddle a horse properly. If you’ve never done it before, it’s not something you want to guess about, as saddling the wrong way can result in a bad accident and possible injuries. These step by step photos will show you what to do and what not to do when you’re wanting to learn how to put a saddle on a horse.
Our model here is my good old Quarter Horse Rudy, whom I grew up with. He is twenty-three years old now, but still looking good and ever his sweet old self. While some of these instructions may seem over-simplified, I do want to cover everything in order to provide the best education I can for someone who has never saddled a horse before.
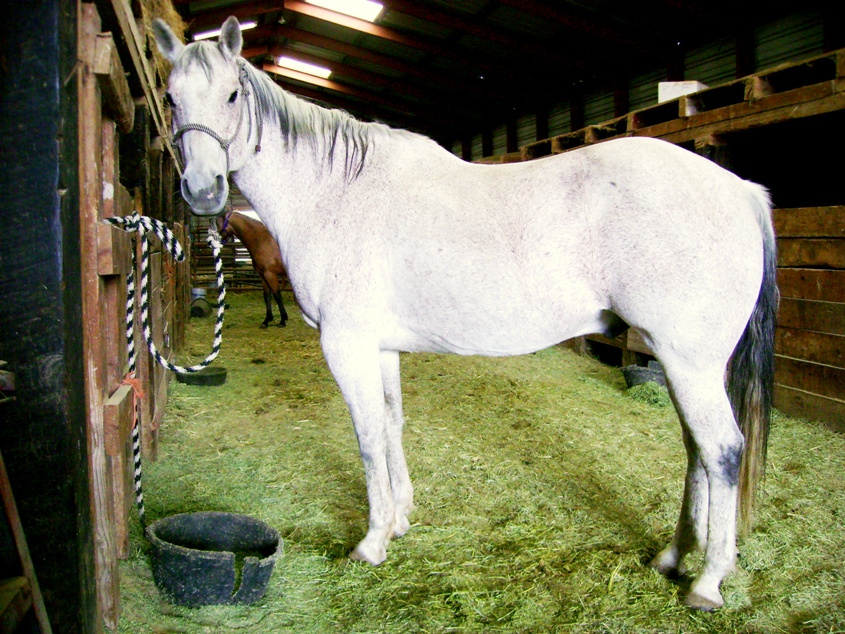 First of all, you want to start with a clean horse. That may go without saying, but horses naturally collect mud, hay, burrs, and other strange things in their coats, and throwing a saddle on top of a sandburr can cause a big wreck. I admit to tossing saddles on unbrushed horses a few times in my life, but I always at least run my arm across the horse’s back to check for anything ouchy, and always under the belly right behind the forelegs where the cinch will fit. That’s probably the most uncomfortable place for dirt on a horse, because a tight cinch will rub and irritate the horse if there’s mud or anything matted in the horse’s hair there. So check the horse over at the very least, and it’s much more kind to give him a thorough grooming before you saddle up.
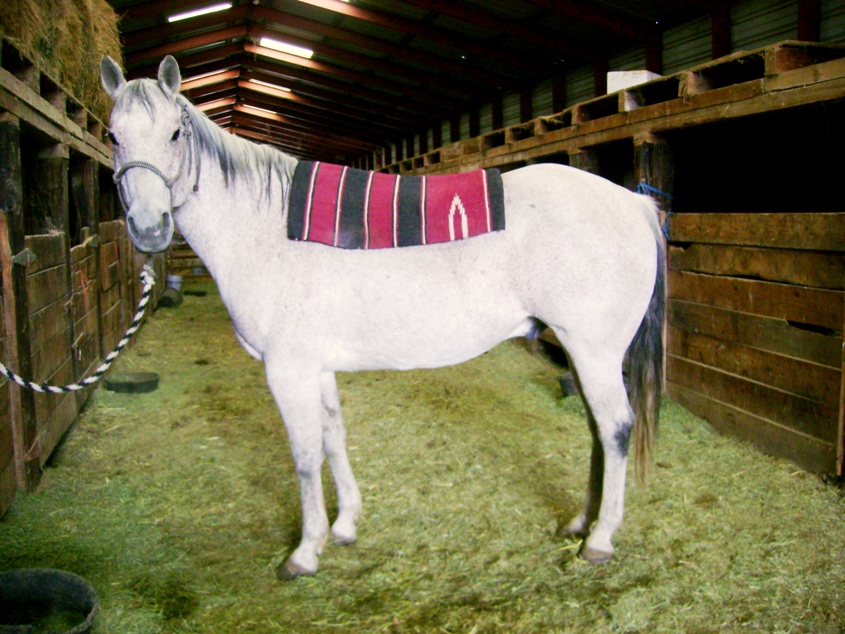 Next, put the saddle pad on and position it properly. The saddle blanket we put on Rudy here looks a little forward at the moment, but when you get the saddle up there too, it inevitably will slide back. So start with it at least covering the horse’s withers (the bump at the front of the horse’s back) and you should look at the horse’s front leg to line it up—you want the front of the saddle pad to be ahead of where the cinch will fit, and the cinch fits right behind the horse’s front legs. So place your saddle pad just like this—a typical beginner’s mistake is to put it way too far back.
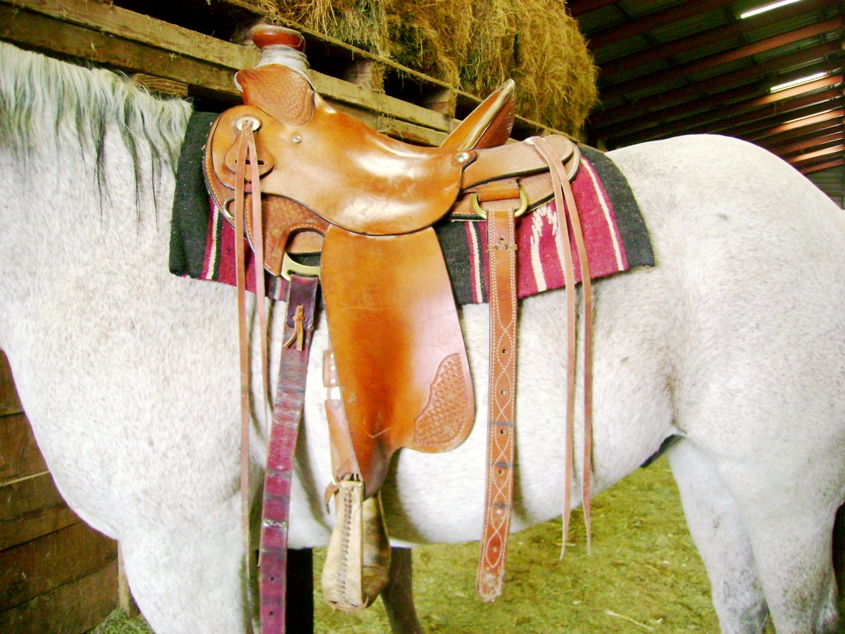 Then set the saddle on. Notice, I said “set”. This is because that’s the proper procedure, and slinging the saddle on with all the cinches and stirrups whacking the horse on the way is the wrong method. I see it all the time (my dad’s method was a little that way), and cringe for the horse when I see forty pounds being plunked down on the horse’s back without warning. It works best to lay your cinches across the back of the saddle, and loop the right stirrup up to hook over the saddle horn, then lift the saddle into the air and set it on the horse’s back. I go around to the off side then, and bring down the cinches and lower the stirrup. Then back to the left side of the horse to cinch up.
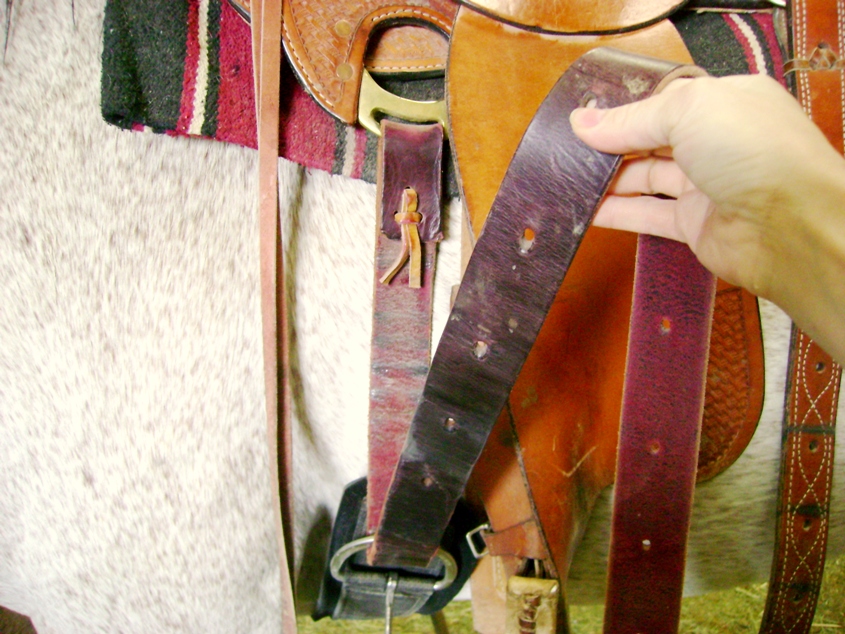 This long leather strap on the left side of the saddle is called a latigo, otherwise termed “tie strap”. The short doubled leather part on the right side of the saddle is called the off-billet, and the cinch attaches to this. Standing on the left side of the horse, reach under the horse’s belly and grab the cinch, bringing it under and passing the end of the latigo through the cinch ring like a belt buckle, and then pull the latigo up to fit the cinch tightly against the horse’s belly. Take a quick moment here to assess the position of the cinch—is it too far forward? or too far back? It should fit somewhere in the space immediately behind the horse’s front legs. If it’s too far back, loosen it and lift the saddle and pad, bringing them forward and then sliding them back a half inch or so to smooth the hair backwards. If it’s too far forward, slide it back a little. Then you’re ready to tighten the cinch and proceed.
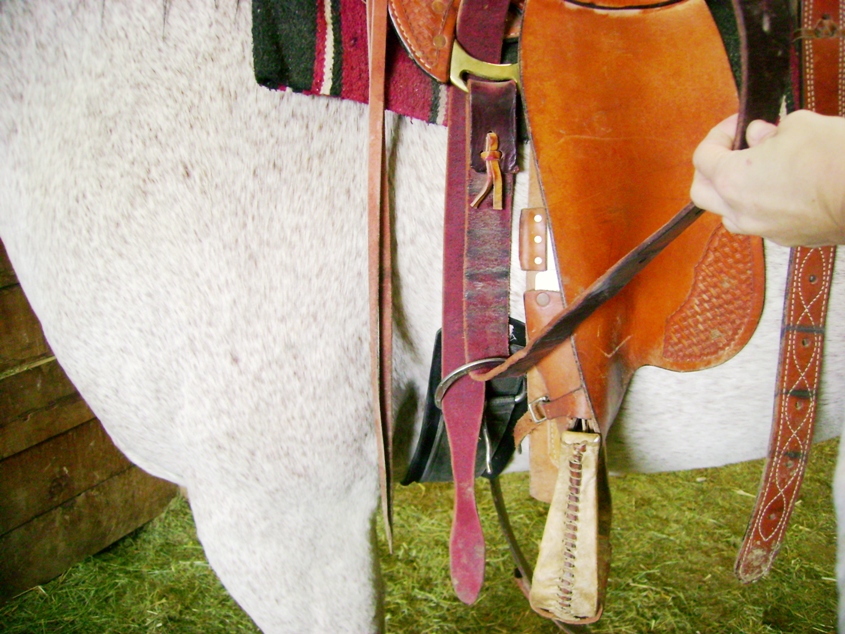 This photo shows how you then pass the end of the latigo through the upper D ring of the saddle, and then back down through the cinch ring in a second wrap. Not every western saddle will look like this one, but the general idea is the same: you want to wrap your latigo at least twice before buckling it.
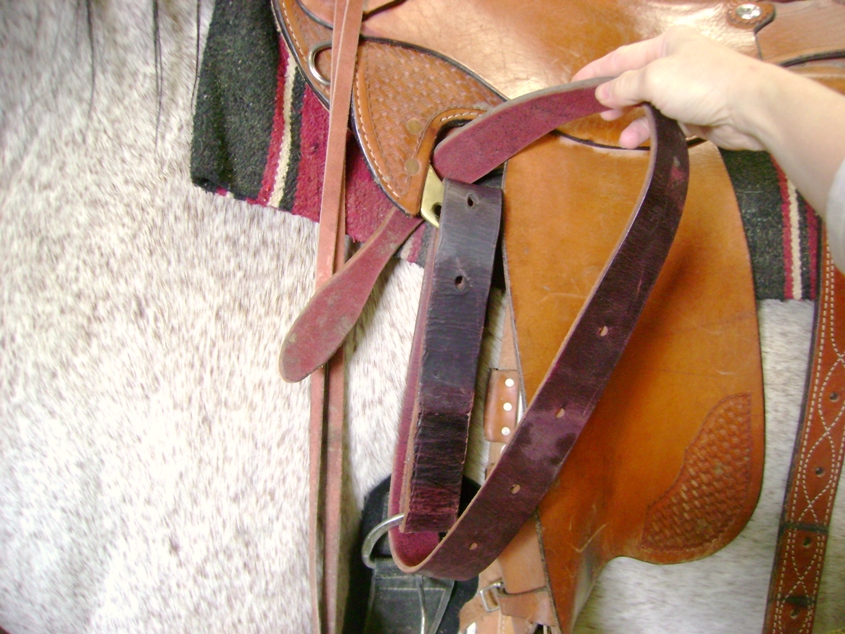 The method may vary depending on how big a girth the horse has, how long the latigo is, and how long the cinch is. But this one is being wrapped yet a third time, down through the D-ring and back to the cinch buckle. It also depends on how many holes are in your latigo and where their spacing is at. If you have wrapped twice and the holes aren’t positioned near the buckle to find a good one to lock into, you might need to loosen the cinch up again, go around to the off-billet, and choose a tighter or looser hole in the off-billet. Then repeat the steps to tighten the cinch, and the holes will be in a better position to fasten it.
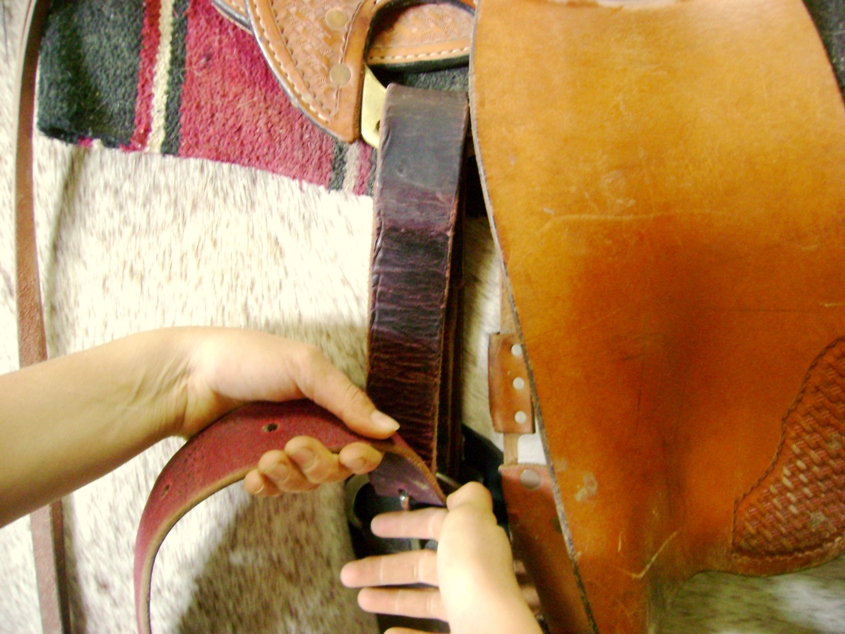 When you have wrapped the latigo at least twice, and have the cinch tight enough, find a hole and buckle the cinch. A common beginner’s mistake is to tighten it too much, so be sure you’re getting it tight enough to keep the saddle from turning, but not so tight that the horse can’t wear it comfortably. There is a happy medium there, if you look for it! Some people say you should be able to slip a couple fingers between the horse’s side and the latigo when it’s fastened. I always think it depends on the horse—if he’s got good withers, you don’t need it quite so tight, and I just fasten it tight enough that it doesn’t slip. You’ll know if you go to get on and the saddle slips towards you when you step into the stirrup (and that’s a whole other blog post I’ll save for later!)
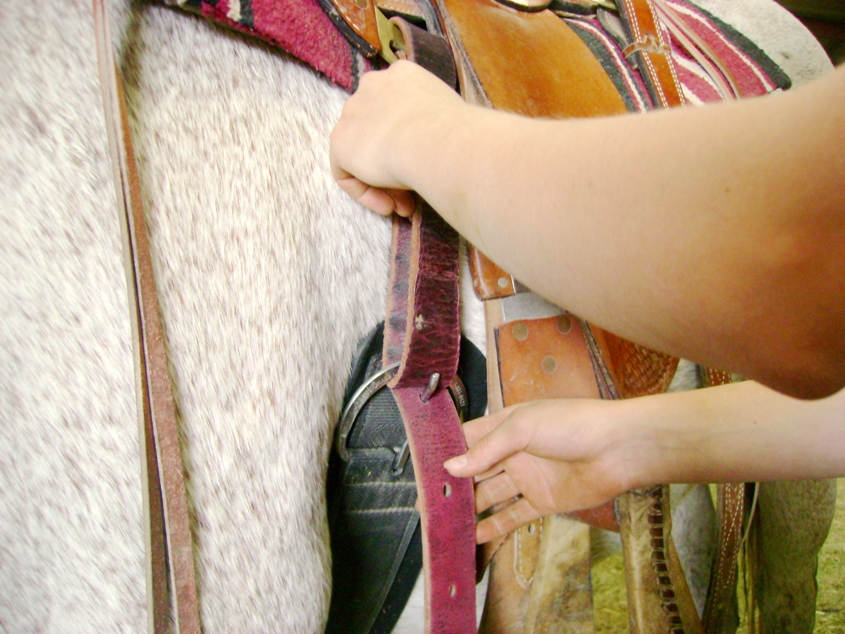 This photo shows something that is difficult to describe, but is an important step to remember. After the buckle is in the hole of the latigo, you need to pull backwards (as in a loosening action) on the latigo so that the buckle tightens into the hole and leaves no chance for the cinch to become unbuckled. Usually when you just place the buckle tongue into the hole, there is some slack left in the latigo, and if you pulled on the end of it, it would easily come back out of the hole. It needs to be “snugged” against the latigo to fit properly and keep it from coming undone again. That’s about the best I can explain it, but it just involves a tug on the latigo as if you’re trying to undo it, which tightens the buckle up against itself so there is no gap and the buckle tongue is not sticking out and “open”.
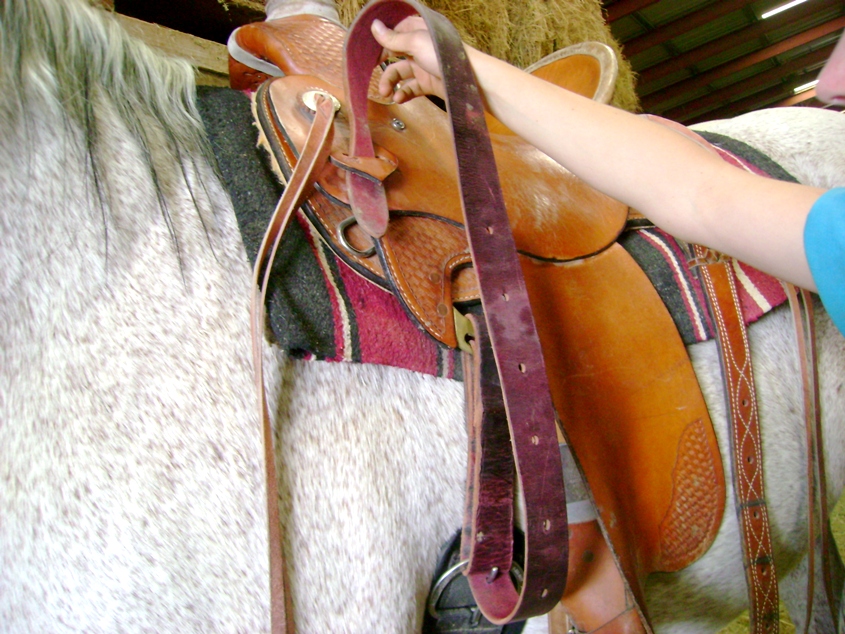 This just shows how you loop the free end of the latigo back up and run it through the “keeper” so it isn’t flopping or dragging along as you ride. If your saddle doesn’t have a keeper, just run it back through your cinch ring once more, and leave the free end hanging down.
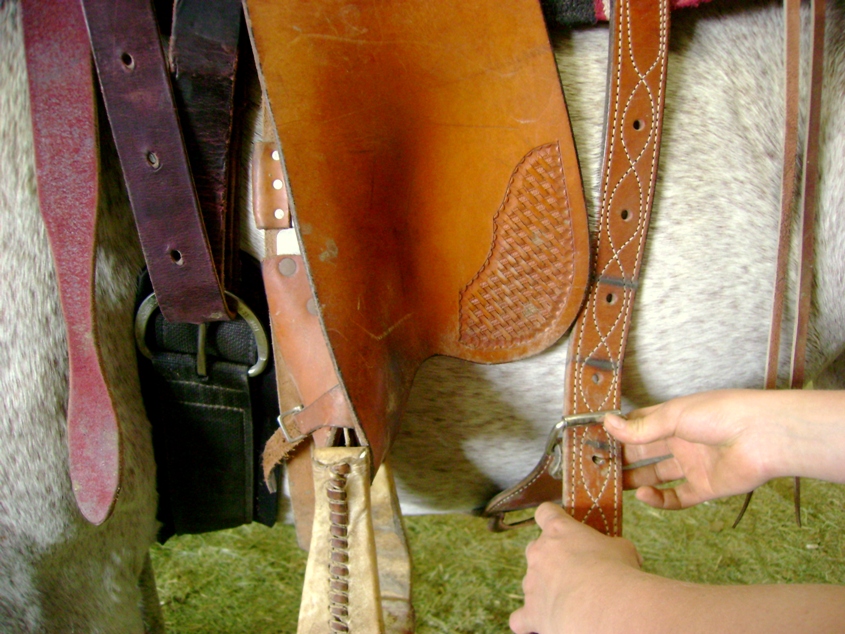 If your saddle has a back cinch, this is how you fasten it. Never fasten the rear cinch first! And always unfasten it first when you’re unsaddling. The rear cinch should not be tight like the front cinch. Its purpose is to prevent the saddle from being pulled forward over the horse’s shoulders if you rope a steer or something, and it keeps the back of the saddle down. But it should be fastened pretty loosely, anywhere from barely touching the horse’s belly to hanging an inch or two below the belly. You don’t want it so loose that a horse’s hind foot could get caught in it when he stomps his rear feet at a fly or something.
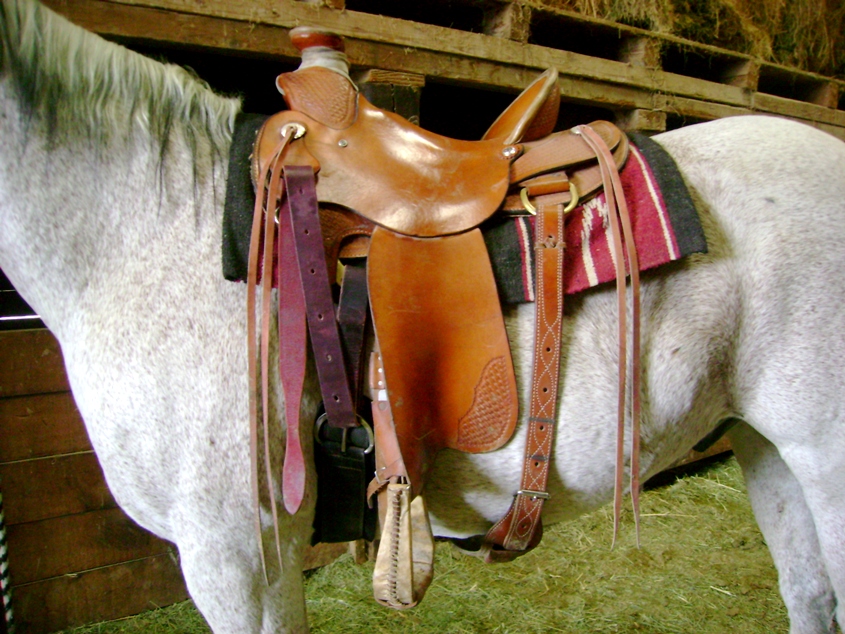 Here is your finished result…a ready to ride horse.
 And…..just in case you missed it in the upper right corner of the “keeper” photo, here it is again: my sister’s nose! Ha ha ha hahaaaaa, we about died when we saw this picture, and she warned me against using the pic in my article. But it was just too funny to not share it.
I hope this post is a help to someone. There are actually quite a few places you can go wrong when you’re first learning to saddle a horse, so it might prevent a few beginner mistakes. The best way to learn is to have a knowledgable horse person right there to show you how to do it, but this is an online resource for how to saddle a horse, in case a knowledgable horse person just isn’t around at the moment. Happy riding!

{ 2 comments }
I wish we had a few “Rudys” on this place. Nice saddle too. Very descriptive and informative. I closed my eyes for bit to envision you and then myself saddling my horse. I totally agree with what you said about “not slinging the saddle up there…whacking the horse on the way” . I’ve seen loads of cowboys do that successfully, and loads of people do it quite unsuccessfully. Hard for a woman to fling it that high. The horse cringes and flinches also. A nice gentle “set” is perfect. One thing I do and (you probably do too) before I get on is a habit of grabbing the saddle horn giving it a little wiggle then step the horse forward a few steps to release any “pinches”. I’m in love with Rudy. Cowgirl Red aka Terah
Thanks! The horse was mine, still lives at my Dad’s place. Can’t take credit for the saddle—it is my sister’s. She’s a little more “cowgirl” than I am.